Total: Rs. 0
Prices inclusive of GST

Do you ever scroll through Instagram feeling jealous of perfectly manicured nails, only to realize your hands feel neglected? Between busy lifestyles, nail salon costs, and lack of time, giving yourself a salon-grade manicure feels out of reach. DIY press-on nails might seem like a quick fix, but without proper prep, they can damage your natural nails or don’t last as long as they should.
Neglecting nail care leads to brittle cuticles, uneven nail beds, and potential infections. Press-ons without prep can peel off quickly, wasting money and harming nail health. A strong base and proper nail routine aren’t just about looks—they’re about protecting your nails from dryness, breakage, and damage caused by peeling or force-removed glue.
This guide, "Easy Steps for Perfect DIY Press-on Nails," simplifies everything, whether you're a beginner or a seasoned nail-lover. Step-by-step, you'll go from prepping cuticles to applying SOEZI press-ons. We stitch in our nourishing products so your at-home manicure looks stunning and keeps nails naturally strong. Let's make DIY salon-quality easy, safe, and fun!

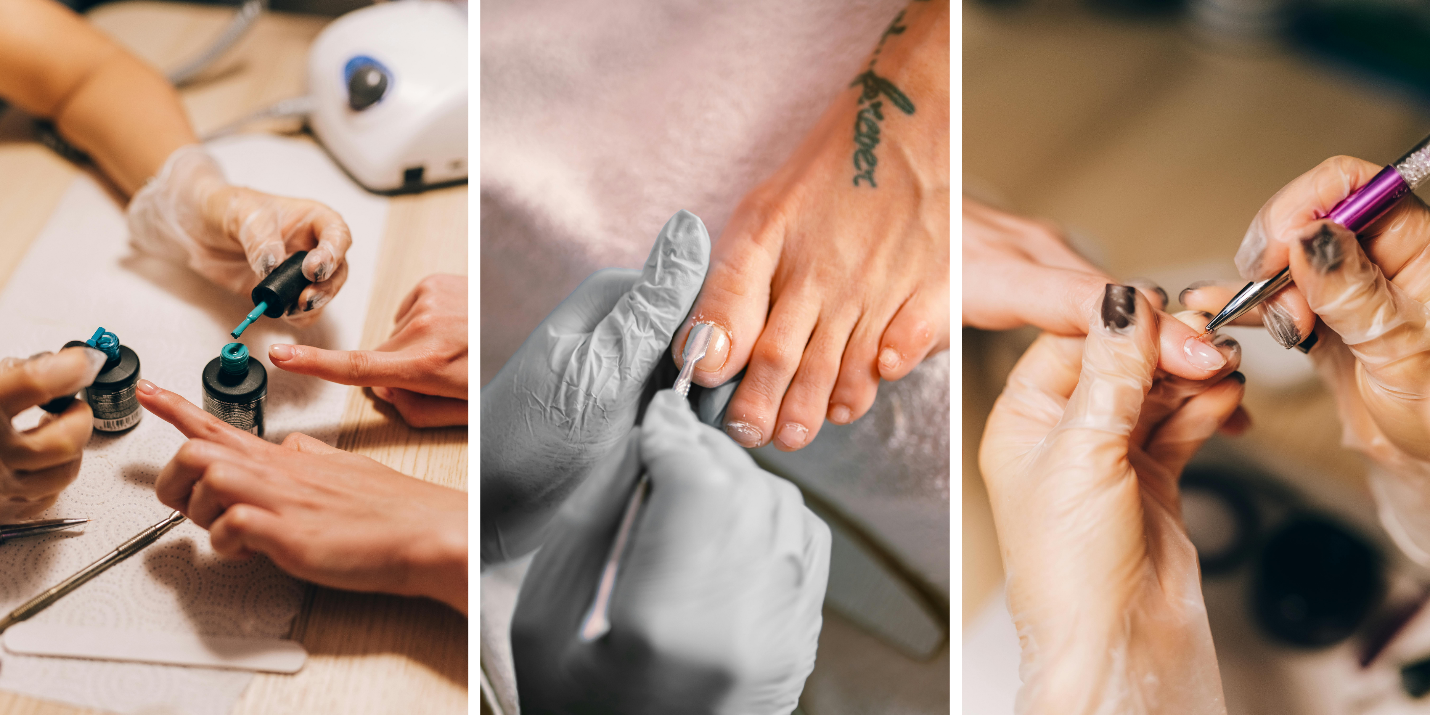
Mastering the art of press-on nails at home isn’t just about sticking and pressing. It’s a full ritual of care and precision that protects your natural nails while delivering a salon-quality finish. Here’s how to do a manicure at home like a pro using SOEZI’s nourishing formulas and expertly crafted press-ons.
Before anything else, remove all old polish—even invisible residue matters. Use a gentle, acetone-free remover to preserve nail strength and reduce drying. This ensures your press-ons adhere smoothly and securely, preventing air bubbles or early lifting.
Soak your hands in warm water for 5–7 minutes. This softens the skin and makes your cuticles more pliable. Apply a callous/cuticle remover, like a gel-based or enzymatic formula, then gently push back the cuticles with a wooden or rubber-tipped pusher. Clean cuticles are essential—they prevent press-ons from lifting prematurely and give a clean, seamless look.
Trim nails straight across to your desired length. Then, file them into a flattering shape—round, almond, or square. Follow up with gentle buffing to smooth out ridges and create a matte finish for better press-on grip. This prepping step creates the foundation for longevity and avoids lifting at the edges.
Hydration is the secret sauce of long-lasting manicures. Apply a nutrient-rich cuticle oil or SOEZI’s nail care elixir. Massage it into the nail beds and surrounding skin to promote flexibility and health. Well-hydrated nails reduce breakage and make press-ons more comfortable to wear.
Wipe nails with rubbing alcohol or a nail dehydrator to remove excess oils from the nail plate. This primes the surface for maximum glue grip. For added longevity, use SOEZI’s nail primer or base coat—specially designed to extend wear time without damaging your natural nails.
Choose press-ons that match your natural nail width. Apply a thin layer of glue to both the press-on and your nail. Align it just above the cuticle and press down firmly for 10–15 seconds. Use even pressure to avoid air bubbles and ensure solid adhesion.
Once your press-ons are set, shape the edges gently with a file to ensure they follow your natural curve. This step helps in blending the artificial with the natural, making the manicure look indistinguishably flawless.
Even if your press-ons come pre-polished, adding a high-shine or matte top coat can enhance durability. It creates a protective barrier against water, oils, and daily wear. If you're using bare press-ons, top coat adds that professional polish.
Finish off with a final dose of cuticle oil. This not only seals the deal but also replenishes the moisture lost during application. It keeps your cuticles supple and prevents cracking or peeling.
When you're ready to swap styles, soak your nails in warm water mixed with a gentle cuticle remover. This loosens the adhesive. Never rip off press-ons—they can tear your nail layers. Post-removal, treat your nails with SOEZI's nail recovery balm to restore strength and smoothness.
For a more detailed walkthrough, check out the official SOEZI tutorial and see each step in action.
Even with the perfect steps, it’s those little extras that elevate your mani from good to great. These pro-level habits not only improve the longevity of your press-ons but also keep your natural nails in top condition, so every DIY set looks and feels salon-level.
Strong nails start with internal and external hydration. Drink plenty of water daily, and moisturize your hands and cuticles every night. Use a thick hand cream paired with SOEZI’s cuticle oil to lock in moisture. Hydrated nails are more flexible, reducing the chances of breakage or peeling under press-ons.
Not all nail tools are created equal. Choose glass or crystal nail files instead of coarse emery boards—they’re smoother on your nail plate and help prevent splits. Opt for rubber or silicone cuticle pushers over metal ones. They’re gentler and won’t scratch the nail surface or cause microtears.
Press-on adhesive—whether glue or tabs—can soften or weaken with heat. Avoid applying nails immediately after cooking, washing dishes, or taking hot showers. If you're in a rush, rinse your hands with cool water before starting your application.
If one or two nails start to lift, don't panic or pull them off. Use a toothpick to gently lift the edge and apply a tiny drop of nail glue underneath. Press down for 10 seconds. This trick extends wear and keeps your set looking fresh without a full redo.
Once your press-ons are on, maintenance is key. Reapply cuticle oil every 1–2 days, avoid soaking hands in hot water for too long, and wear gloves while cleaning to protect your mani. This love keeps both your natural nails and press-ons looking better for longer.
Getting your nails done used to mean booking appointments, traveling to a salon, and sitting through hour-long sessions. But with today’s advanced press-on technology—like SOEZI’s ergonomically designed, pro-quality nails—you get all the style with none of the hassle. Let’s break it down:
Time-Saving Convenience
Say goodbye to salon waitlists and scheduling stress. A complete SOEZI manicure can be done in under 20 minutes, anytime, anywhere—perfect for last-minute events or weekly self-care.
Wallet-Friendly
With salons charging anywhere between ₹800 to ₹2500 per session, regular visits add up fast. SOEZI’s reusable press-ons and nourishing nail care products let you achieve multiple looks at a fraction of the cost.
Creative Freedom
Whether you want chrome tips today and classic nudes tomorrow, SOEZI's extensive collection allows you to switch it up based on your mood, outfit, or vibe. Zero commitment, all the fun.
Healthier Nails, Naturally
Acrylics and gel extensions often involve heavy filing and harsh chemicals. With SOEZI’s non-damaging press-ons and nail-loving prep products, you nourish and protect your real nails at every step.
Expensive Over Time
The cost of regular salon visits can quickly outpace your beauty budget, especially if you like to keep your nails fresh.
Risk of Damage
Salons often over-file natural nails during acrylic or gel applications, which can thin out your nail plate over time and cause long-term sensitivity.
Limited Personalization
Unless you’re paying premium prices, salon designs can feel generic. With DIY, you're the designer—no limits, no restrictions.
Time Commitment
From appointment booking to travel and service time, salons take a serious chunk out of your day. DIY is quicker, easier, and lets you multitask while you glam up.
A beautiful manicure doesn’t require a salon, just the right process and products. With this guide, SOEZI empowers you to create stunning DIY press-on nails that are strong, healthy, and customizable. From cuticle prep to press-on perfection, each step sets you up for nail success.
Ready to glow? Explore SOEZI’s cuticle oil, press-ons, and nail repair balms at Soezi.in and treat your nails to the care they deserve. Your hands are your canvas, so make them shine!
1. How often should I replace press-on nails?
Typically after 10–14 days. Remove carefully, hydrate, and let your natural nails rest before a new set.
2. Can I reuse press-ons?
Yes! Clean the back, file edges if needed, and store flat. They often last 2–3 wears.
3. What’s the difference between glues and adhesive tabs?
Glue lasts longer (up to 2 weeks); tabs are gentler and easier to remove.
4. Are cuticle removers safe?
Yes, if used as directed. Look for mild formulas and don’t overapply.
5. How do I fix a press-on that lifts?
Add a small dot of glue, press firmly, and seal with a top coat.
6. Will DIY manicure weaken my nails?
Not with proper care. Use gentle filing, nourishing oils, and limit harsh acetone to keep nails healthy.